How to integrate Microsoft Outlook into Salesforce Sales Cloud?
July 7, 2023 Category : Salesforce Integrations
It’s time to Streamline Your Workflow: A Comprehensive Guide to Salesforce Outlook Integration and Synchronization
Salesforce Outlook Integration refers to the seamless integration between Salesforce and Microsoft Outlook, allowing users to synchronize data, activities and communications between the two platforms.
This integration enables users to access and manage their Salesforce data directly from within Outlook, improving efficiency and productivity.
The Salesforce integration with Outlook is one of a suite of products that give sales reps the power to work from their email applications while keeping Salesforce data up to date.
Here are the steps that are taken to Sync Outlook with Salesforce:
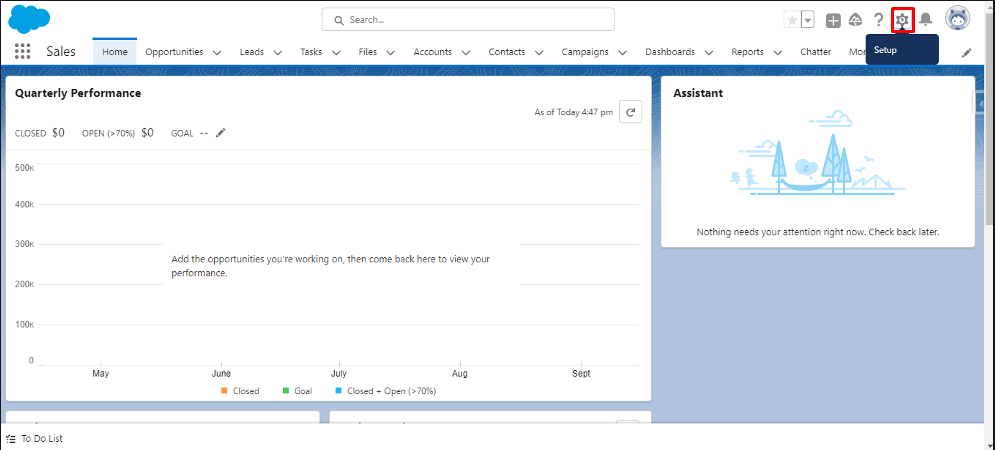
Step 1. Log in to your Salesforce account with administrator privileges.
Step 2. Navigate to the Setup Menu by clicking on the gear icon in the upper-right corner.
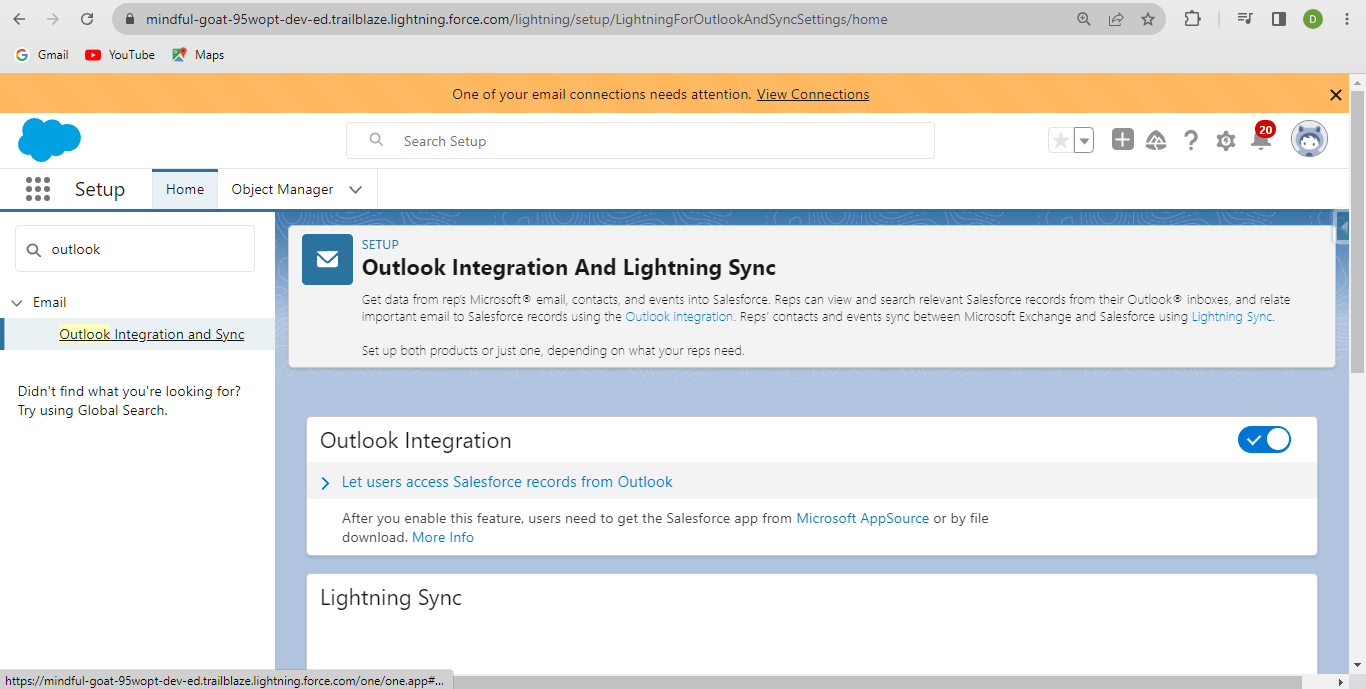
Step 3. In the Setup Menu, search for “Outlook” in the Quick Find box.
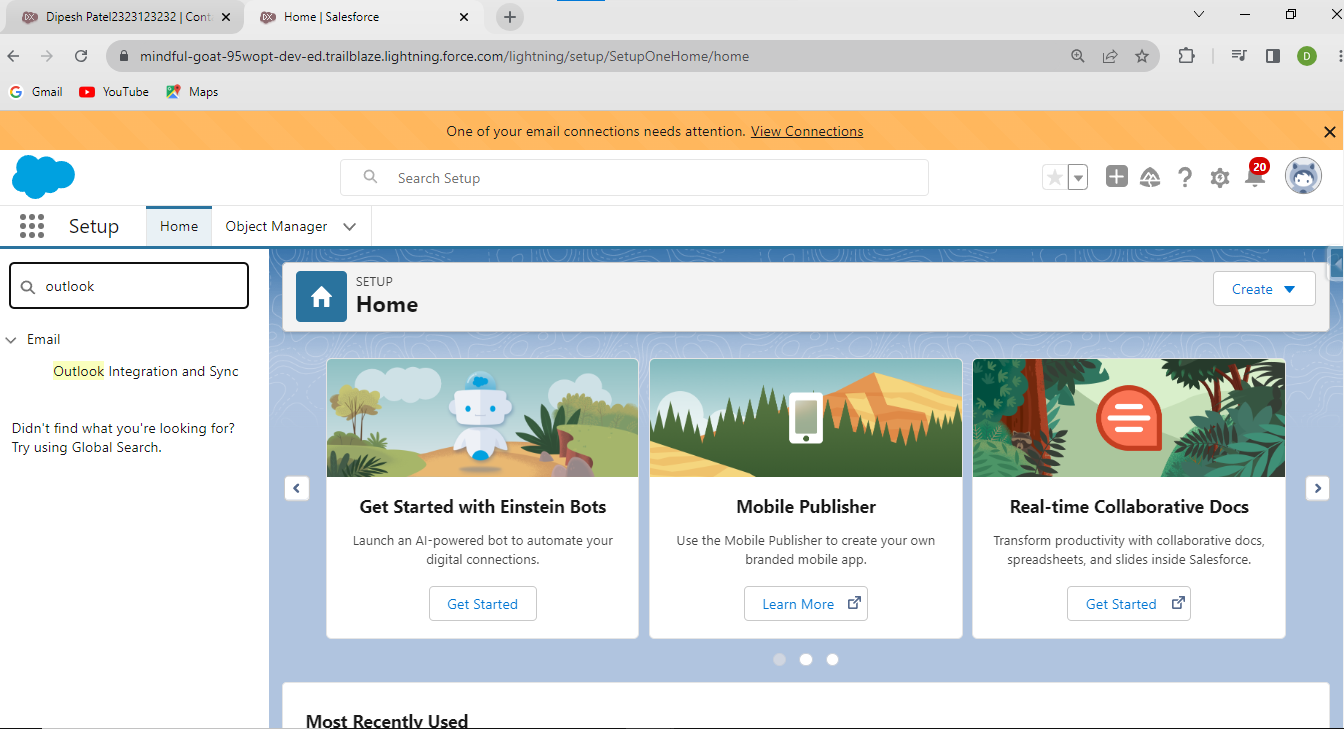
Step 4. Select “Outlook integration and sync.”
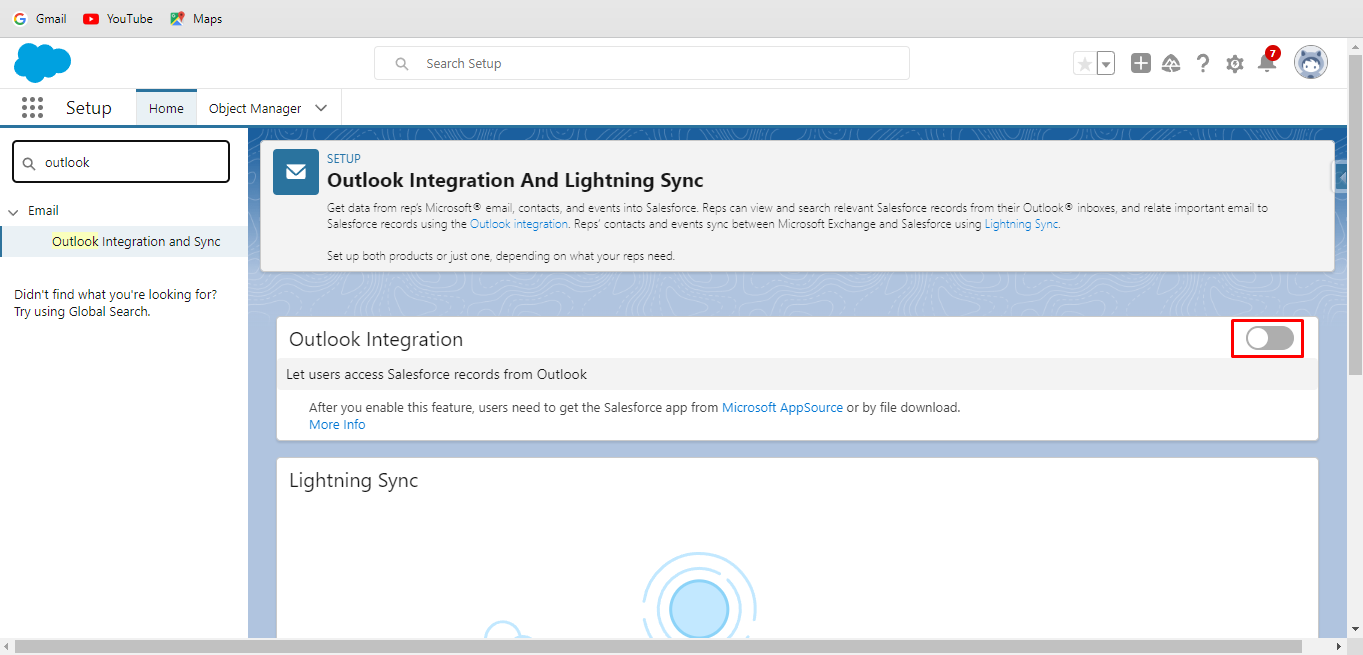
Step 5. Enable Outlook integration and a lightning sync button.
Step 6. From the drop-down option, choose Active and Notify Reps.
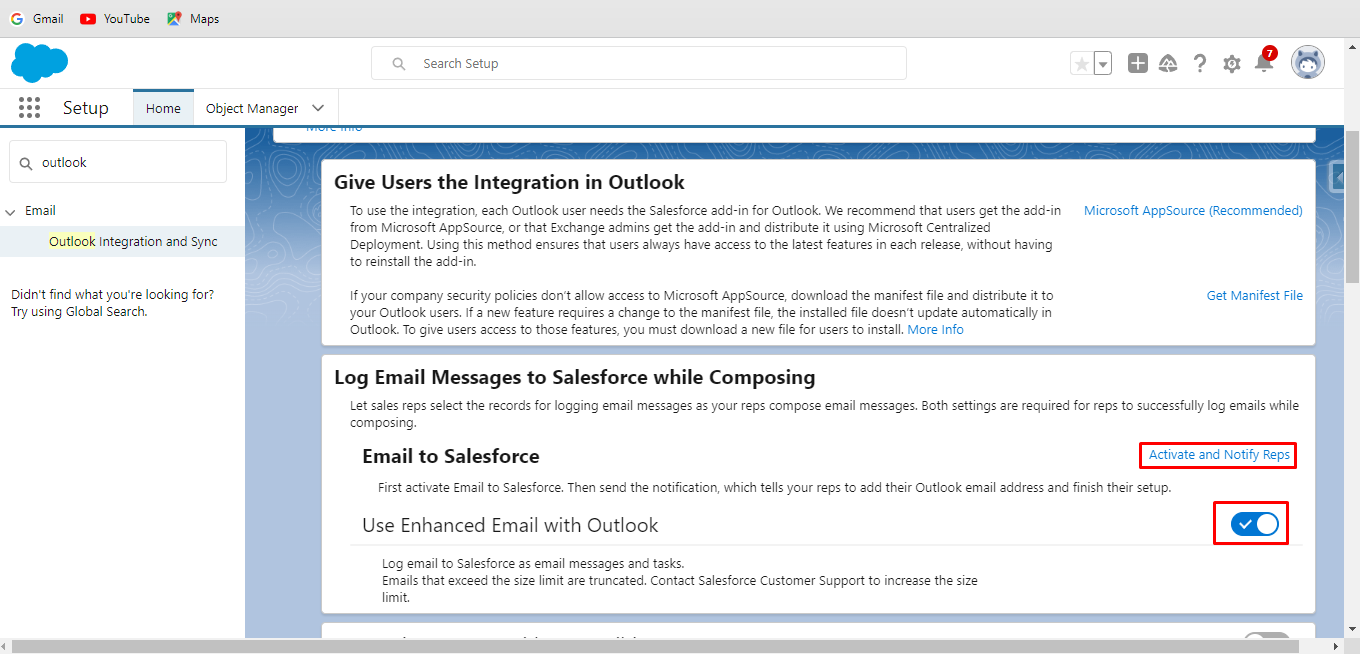
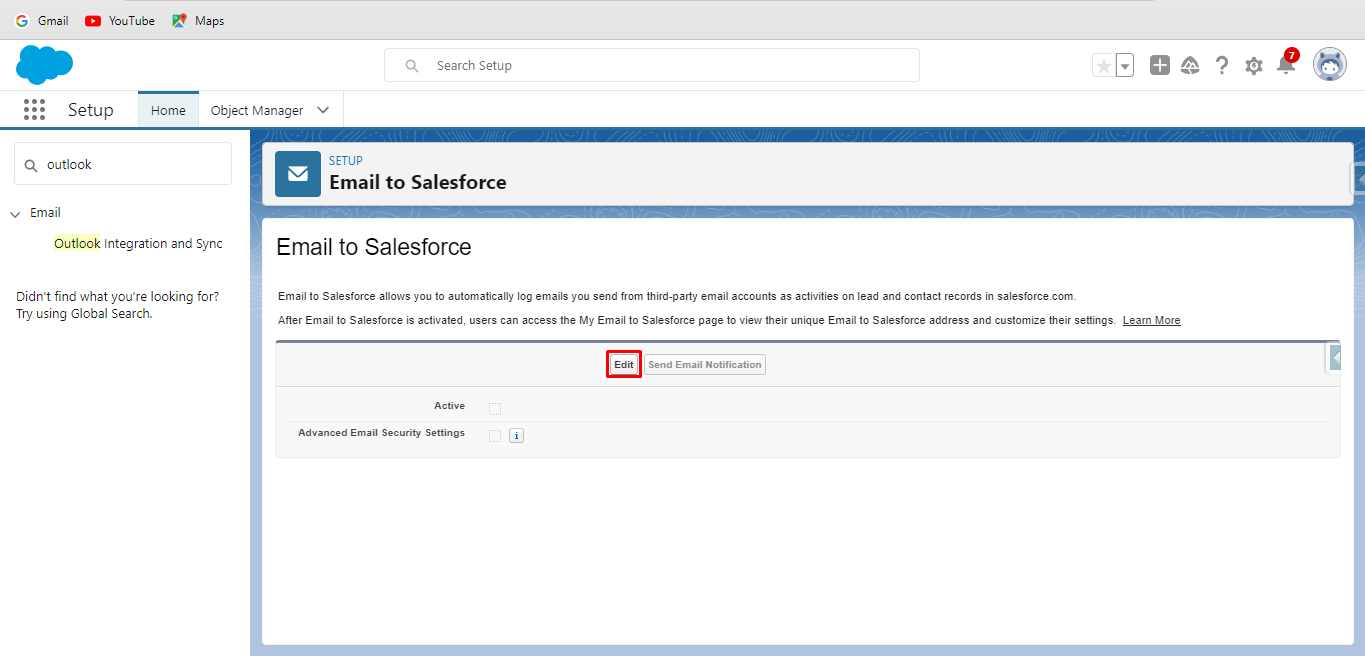
Step 7. Click Edit from the menu.
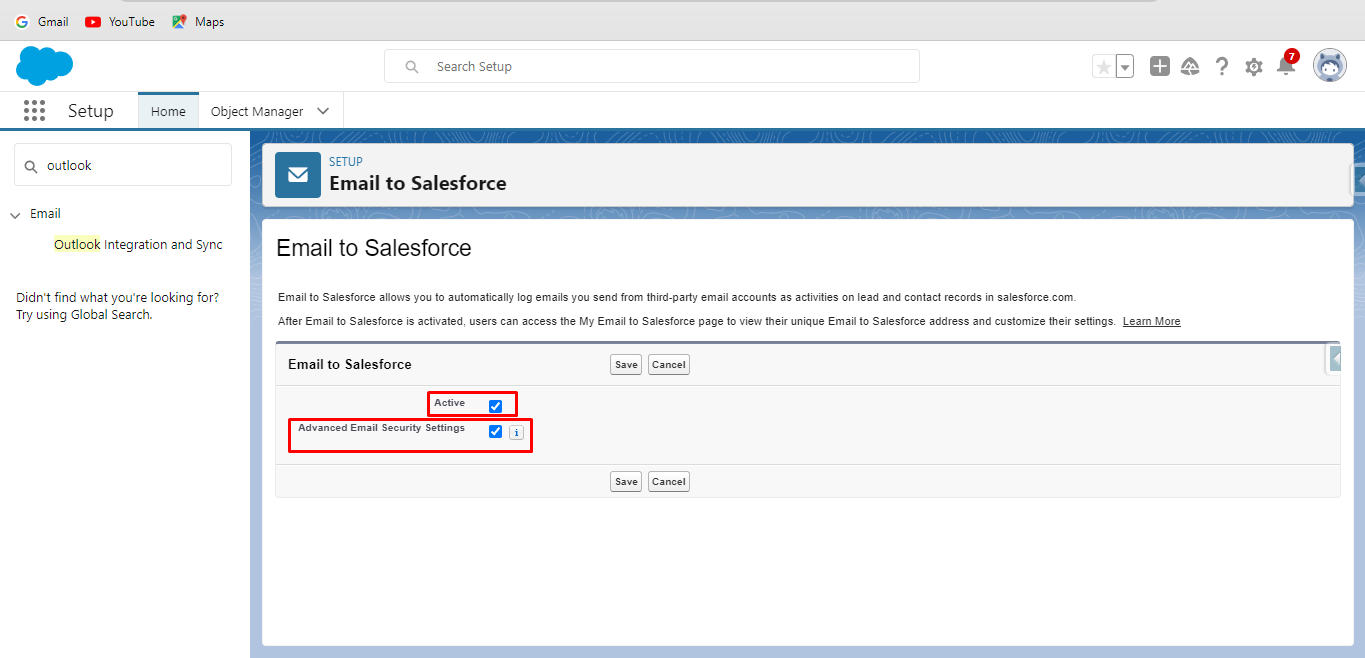
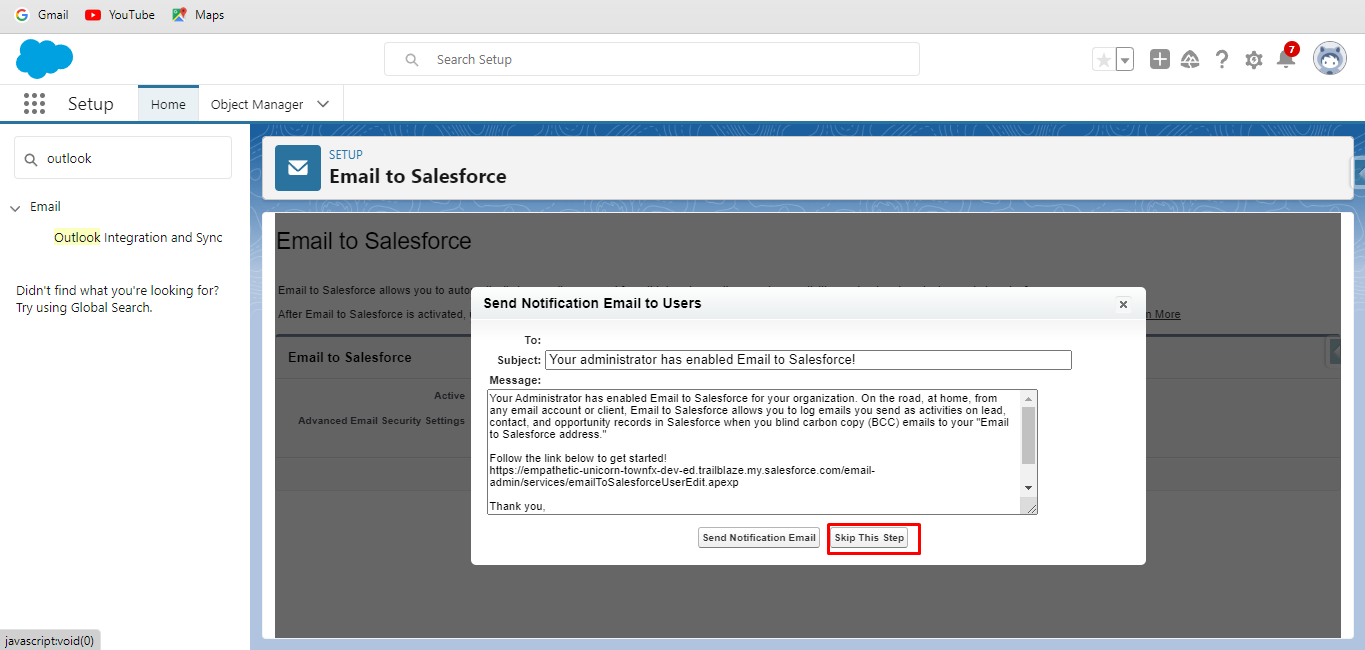
Step 8. Click the Active and Advanced Email Security Settings checkboxes. Click Save.
Step 9. A new popup appears to send notification emails to users. Click on Skip this step
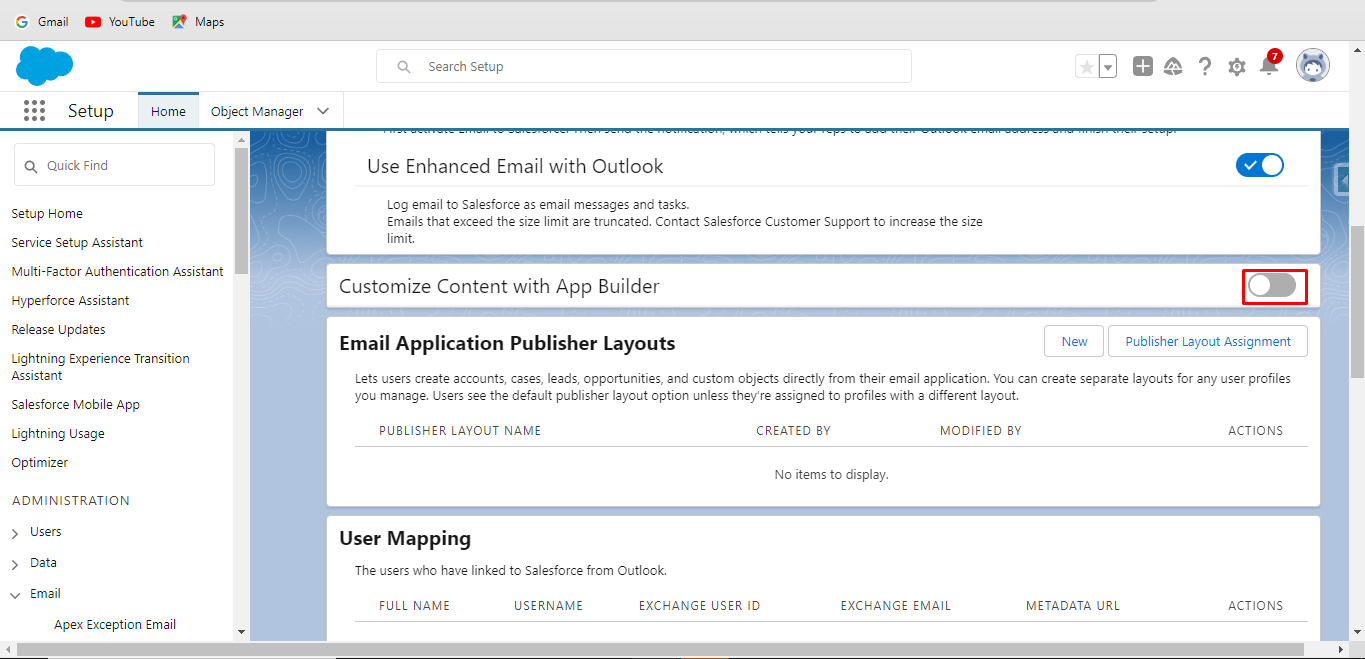
Step 10. Type Outlook once more in Quick Find Box and choose outlook integration again .
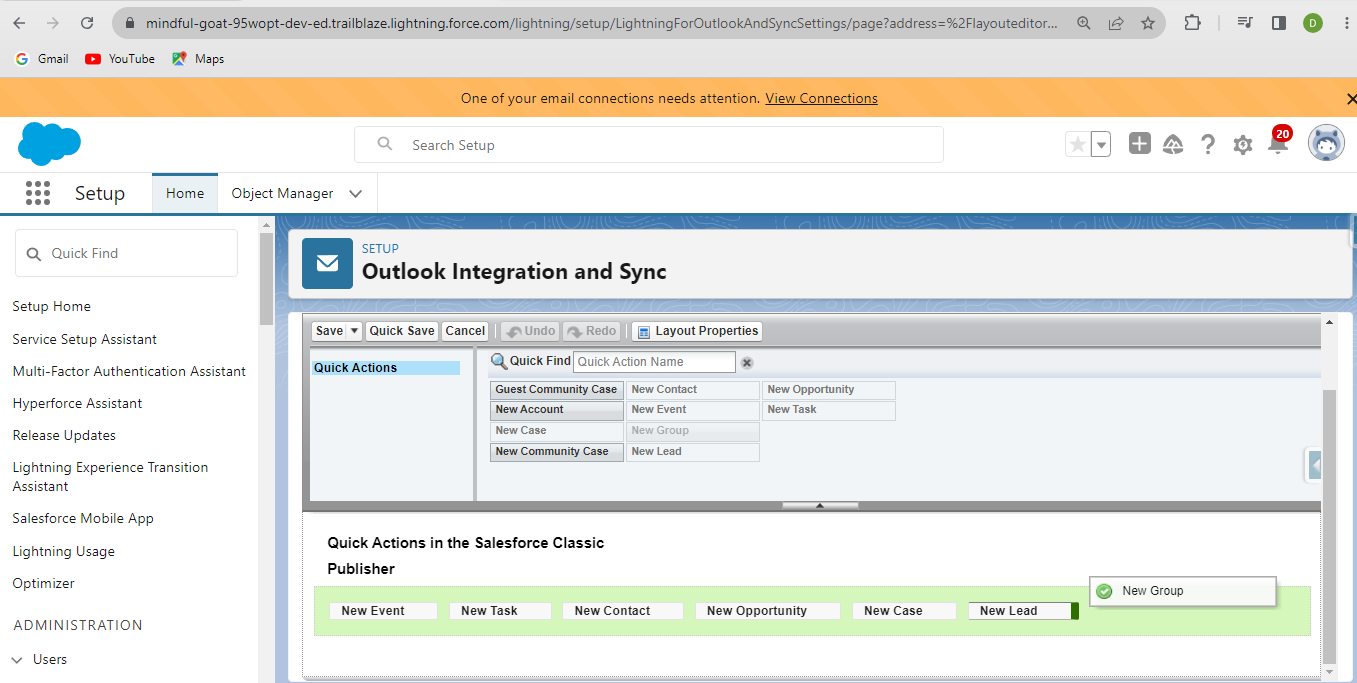
Step 11. Scroll Down and click on Customize Content with App Builder.
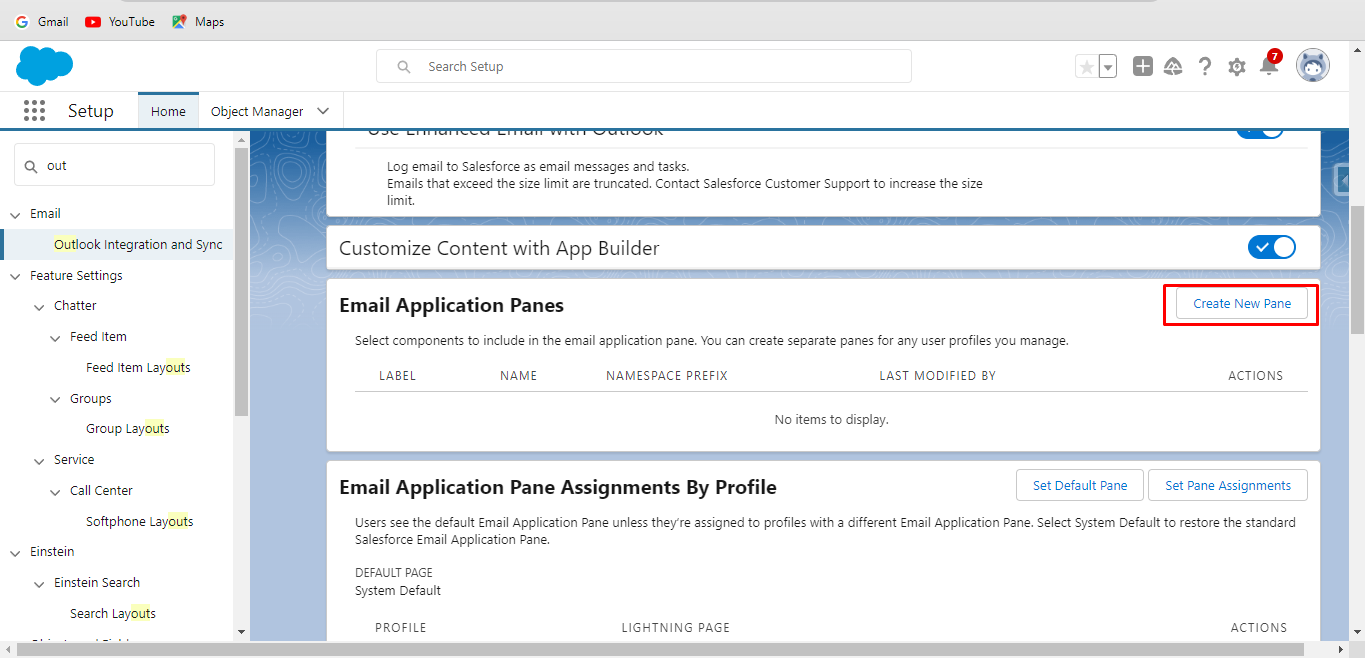
Step 12. Click Create New Pane.
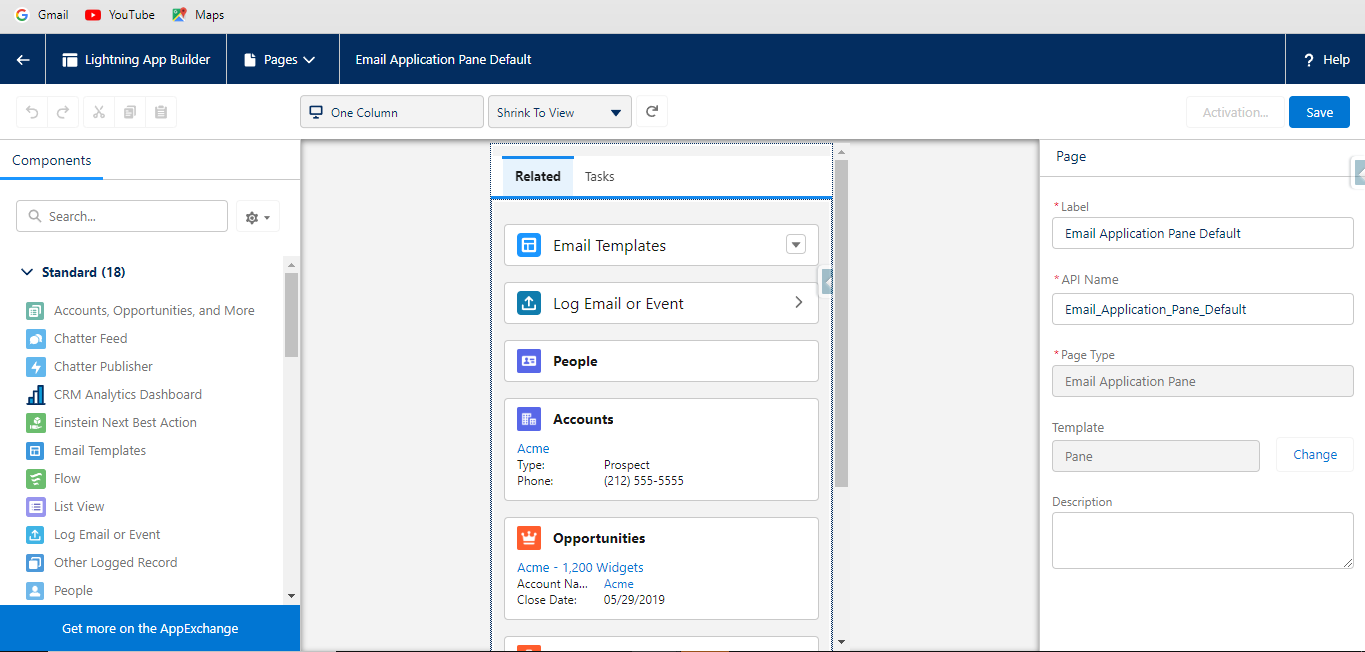
Step 13. Customize the pane as per your requirements. Click Save.
Step 14. Click the Activation button on the left to Save Button.
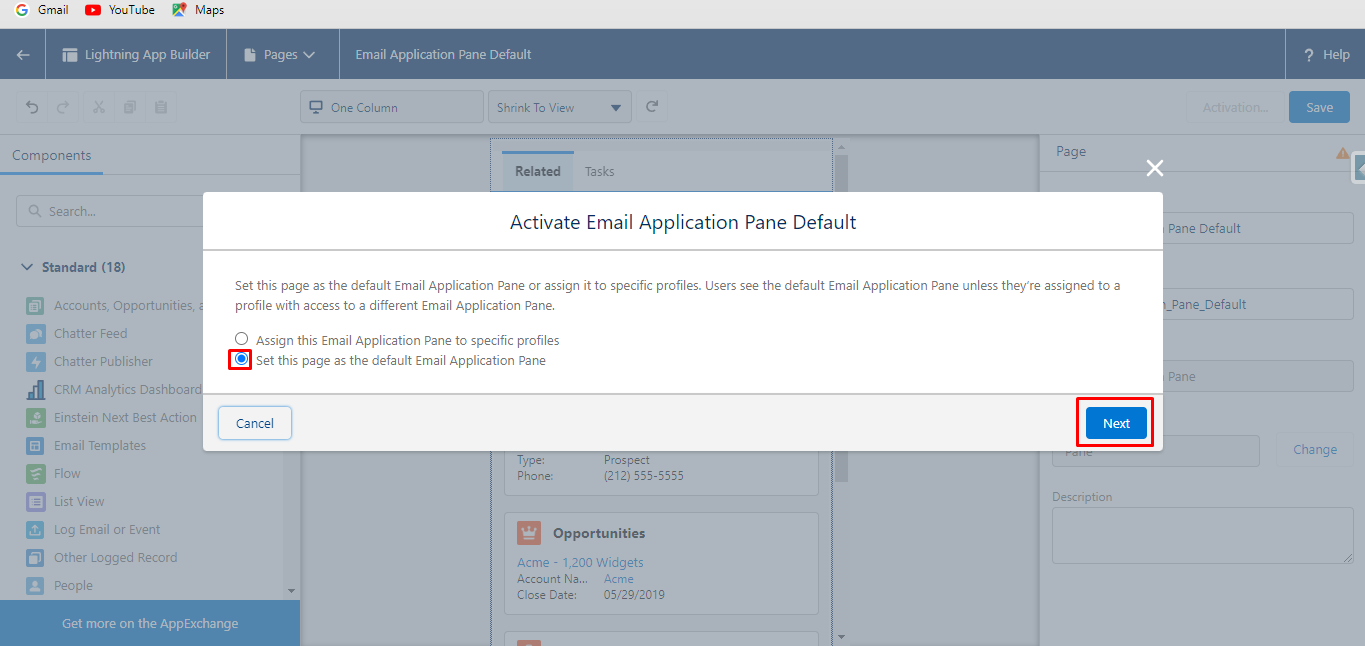
Step 15. You Can assign the same pane to all users or different panes to different users. Click Next.
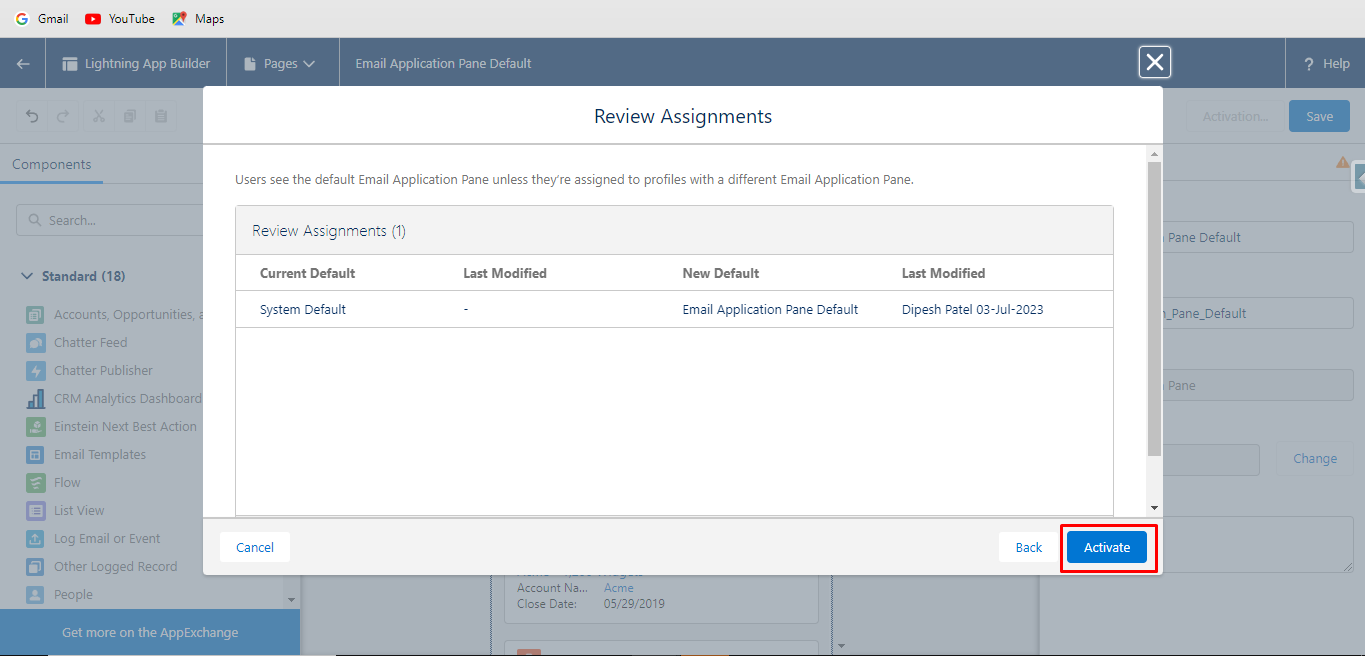
Step 16. Click Activate.
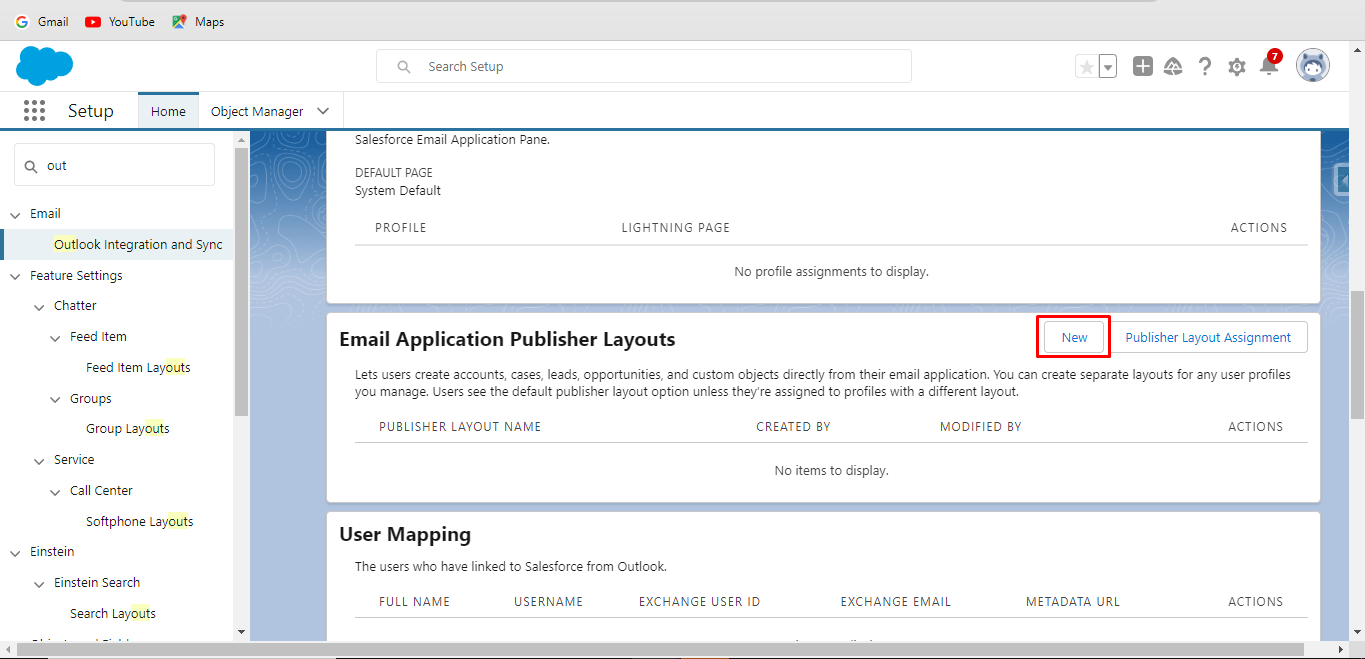
Step 17. From the main outlook integration menu, scroll down in Email Application Publisher Layouts. Click New.
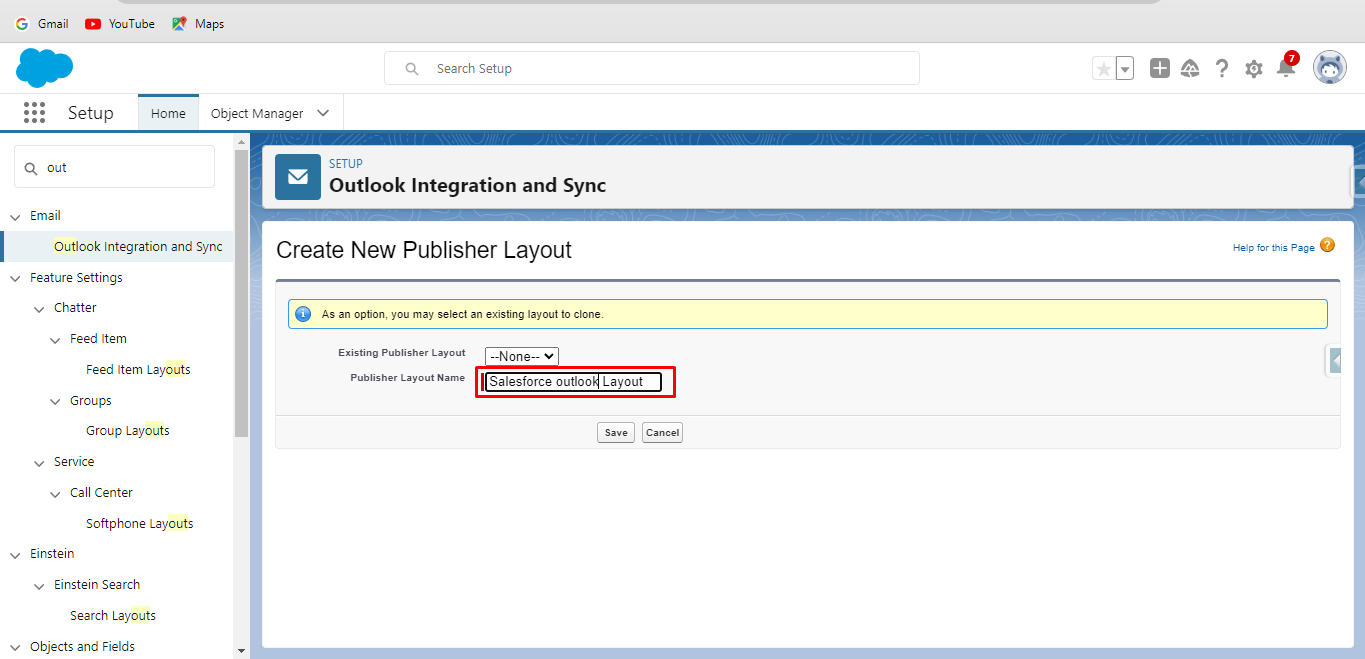
Step 18. Enter the name of the layout. Click Save.
Step 19. Drag-drop the required Actions. Click Save.
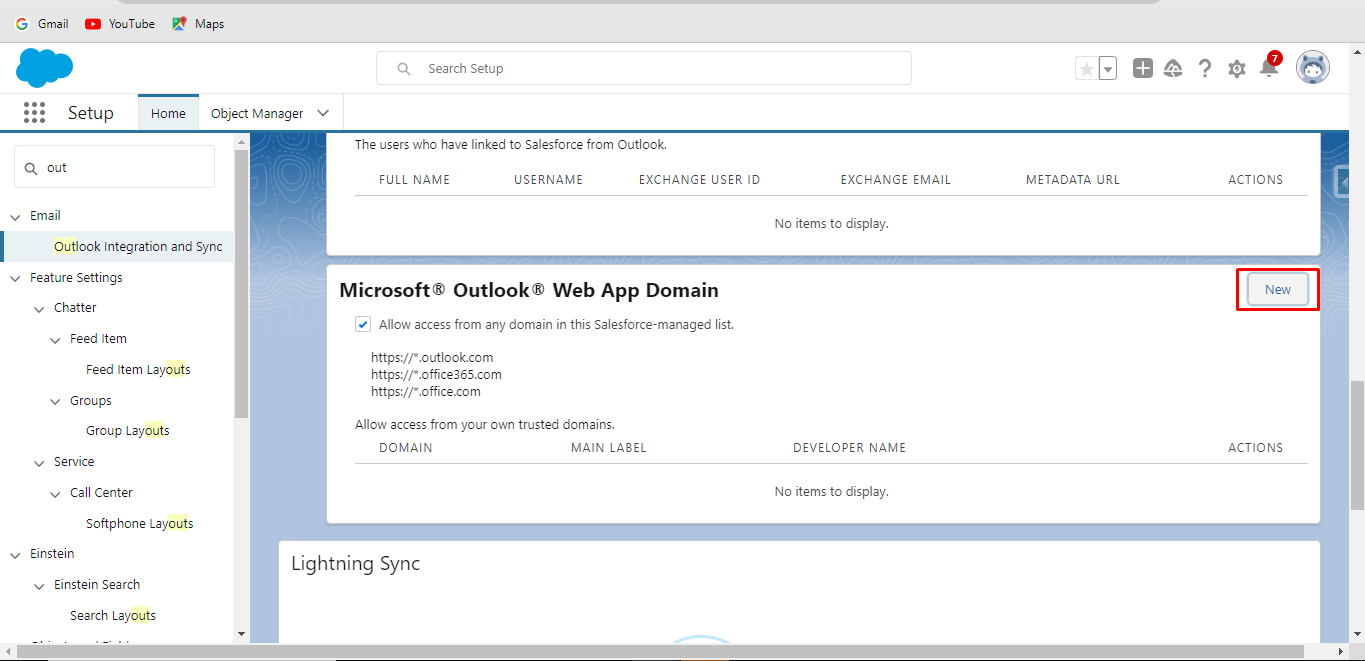
Step 20. In Microsoft® Outlook® Web App Domain menu. Click New.
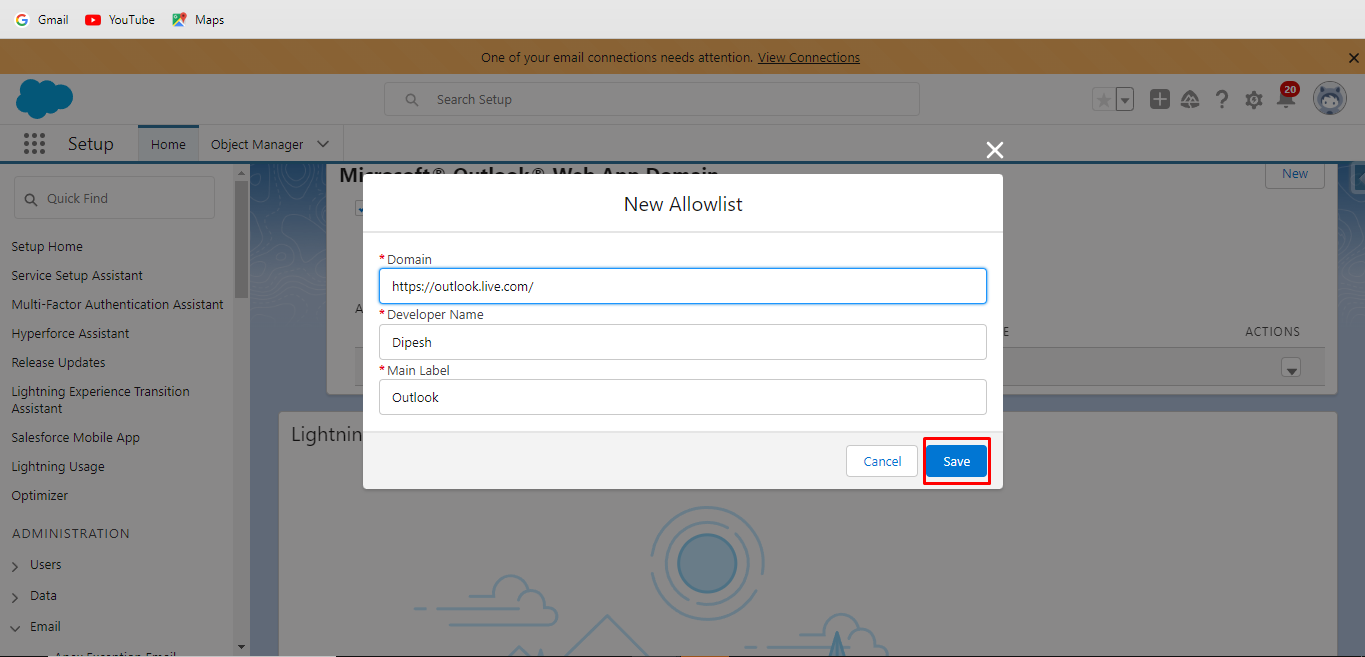
Step 20. Enter Domain, Developer Name and Main Label. Click Save
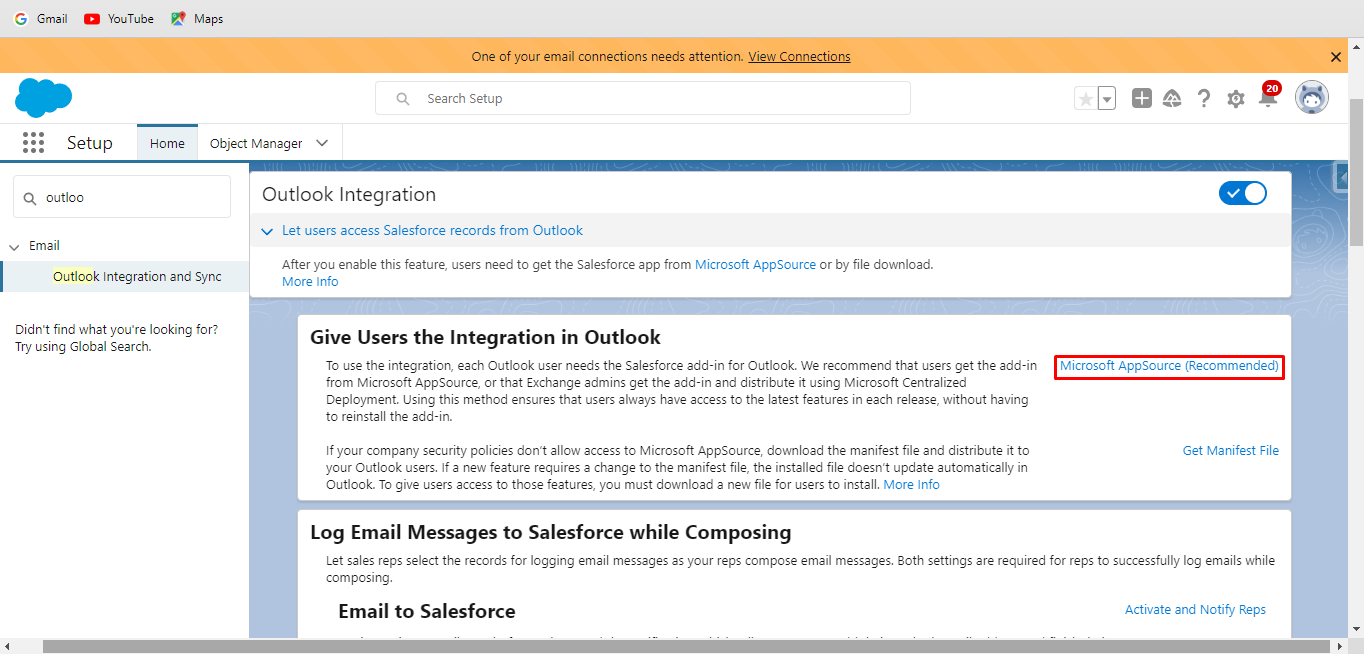
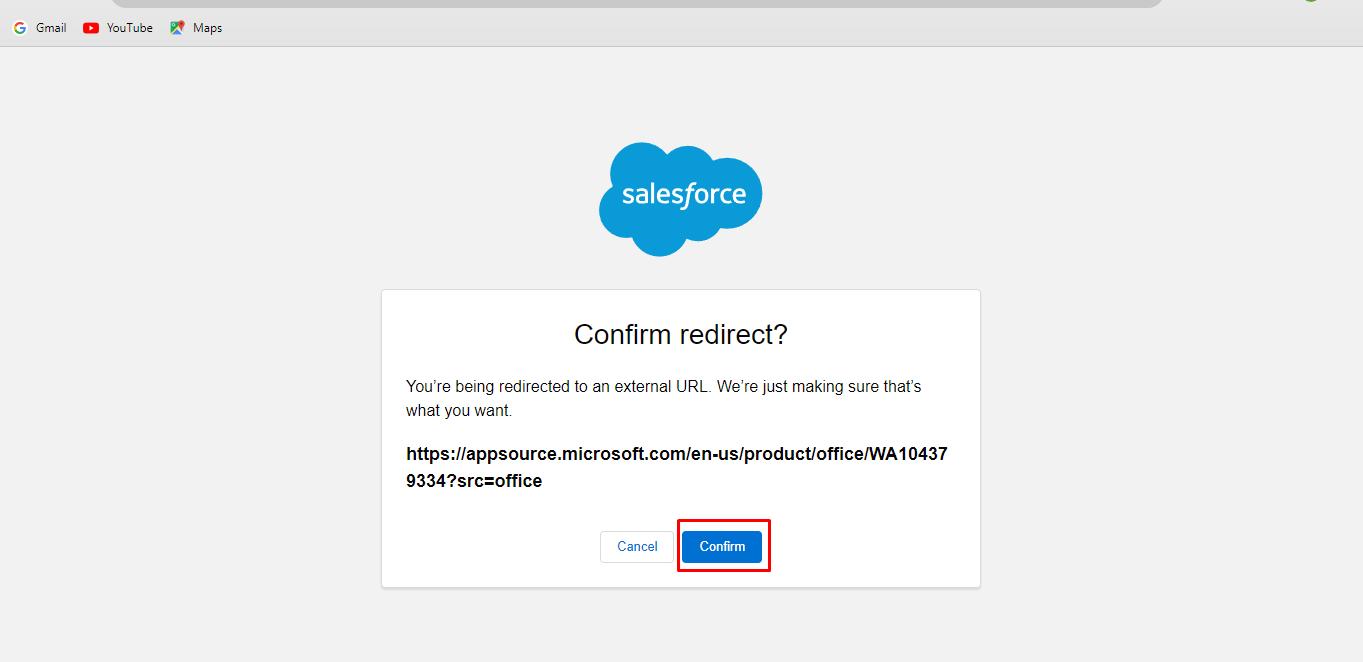
Step 21. In the Give Users the Integration in Outlook. Click Microsoft AppSource (Recommendation) link.
Step 22. You are redirected to a new page. Click Confirm.
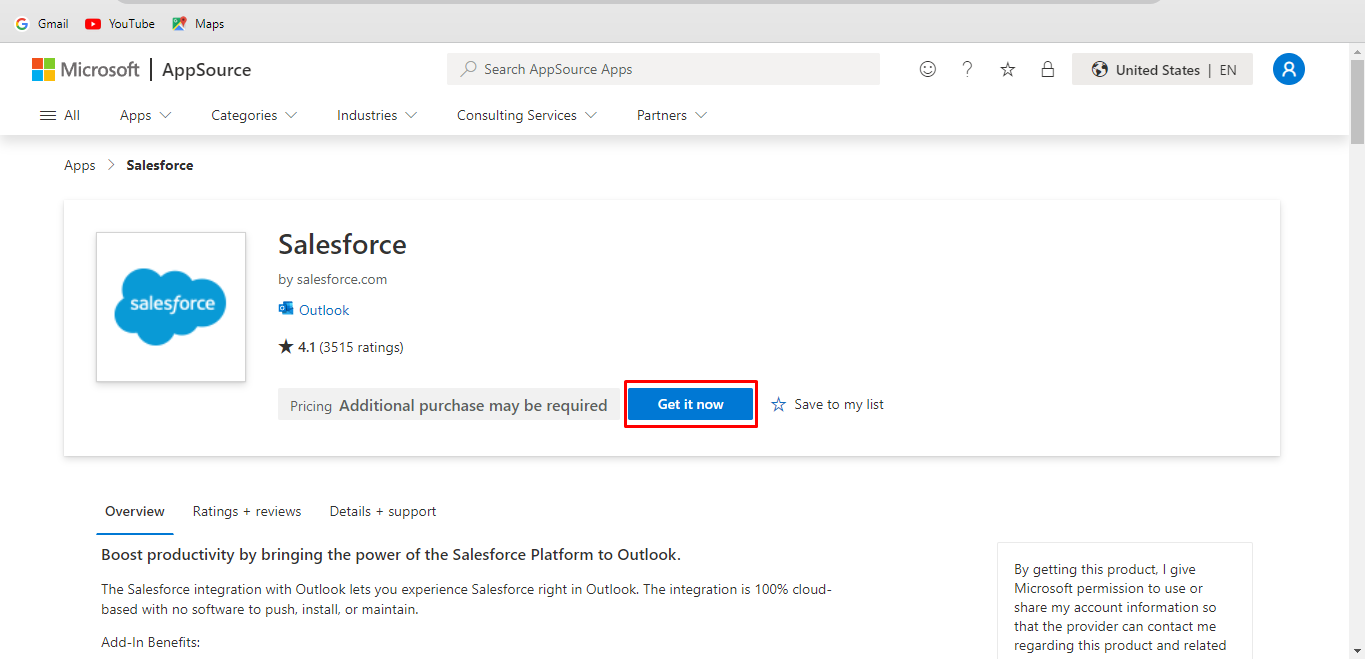
Step 23. After Confirming Redirect, you are redirected to Microsoft AppSource. And ask you to download a new plug-in for salesforce. Click Get it now.
Step 24. Click on the Salesforce Add-on. Then you have to have a login to your salesforce Account, which you have to Sync with outlook.
Outlook is integrated with Salesforce.
Now we can sync Leads and contact from Outlook to Salesforce manually by following the below-mentioned steps. To Set up automatic sync of email and calendar from Outlook to Salesforce or vice versa, we have to set up Einstein Activity Capture.
Let’s take the steps to Sync email from Outlook to Salesforce:
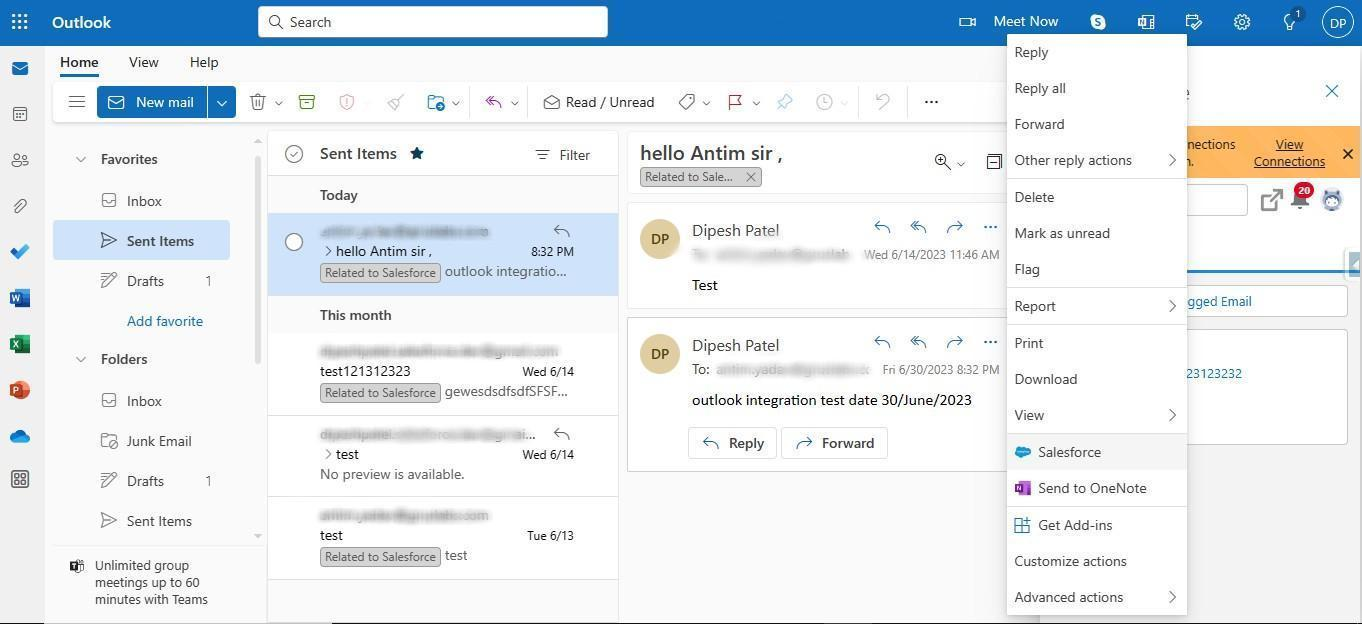
Step 1. In Outlook, open the email which you want to Sync to Salesforce. Click on three dots and from the pop-up menu, select Salesforce add-on.

Step 2. Now your connected salesforce is open. Select the contact with which you want to log your email. the email, if contact with the same email already exists, else it will show an option to create a new contact. Select the Contact /Lead by clicking the checkbox after the name.
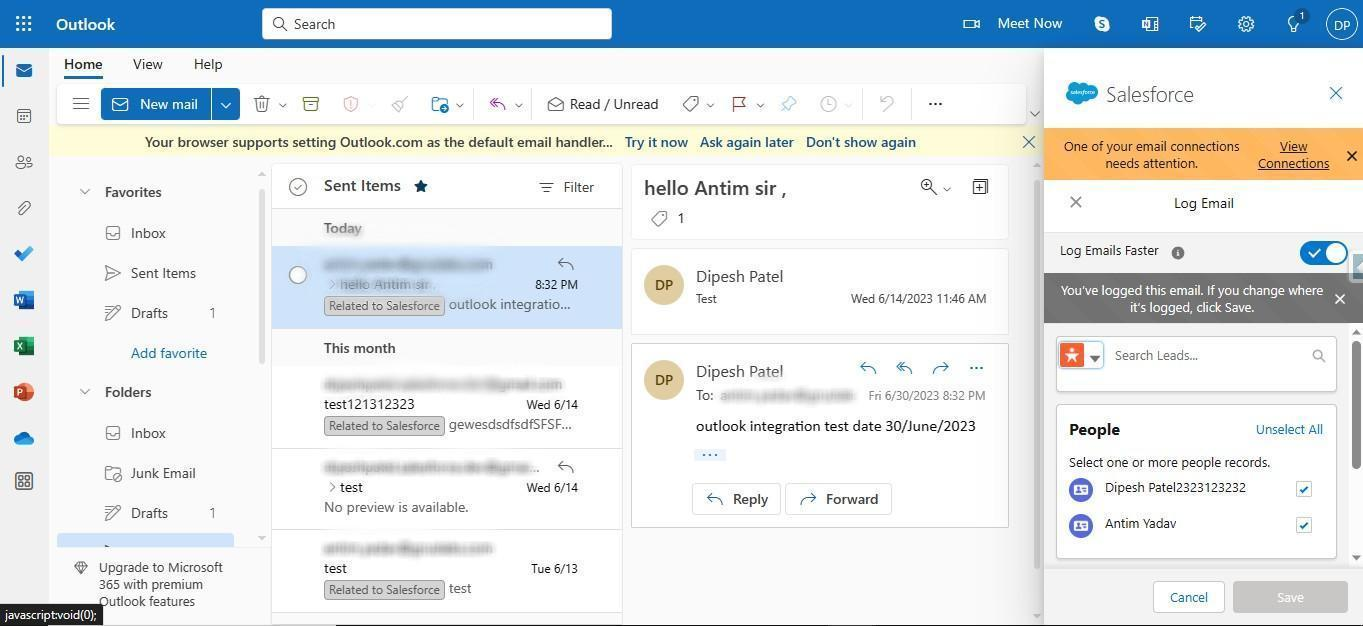
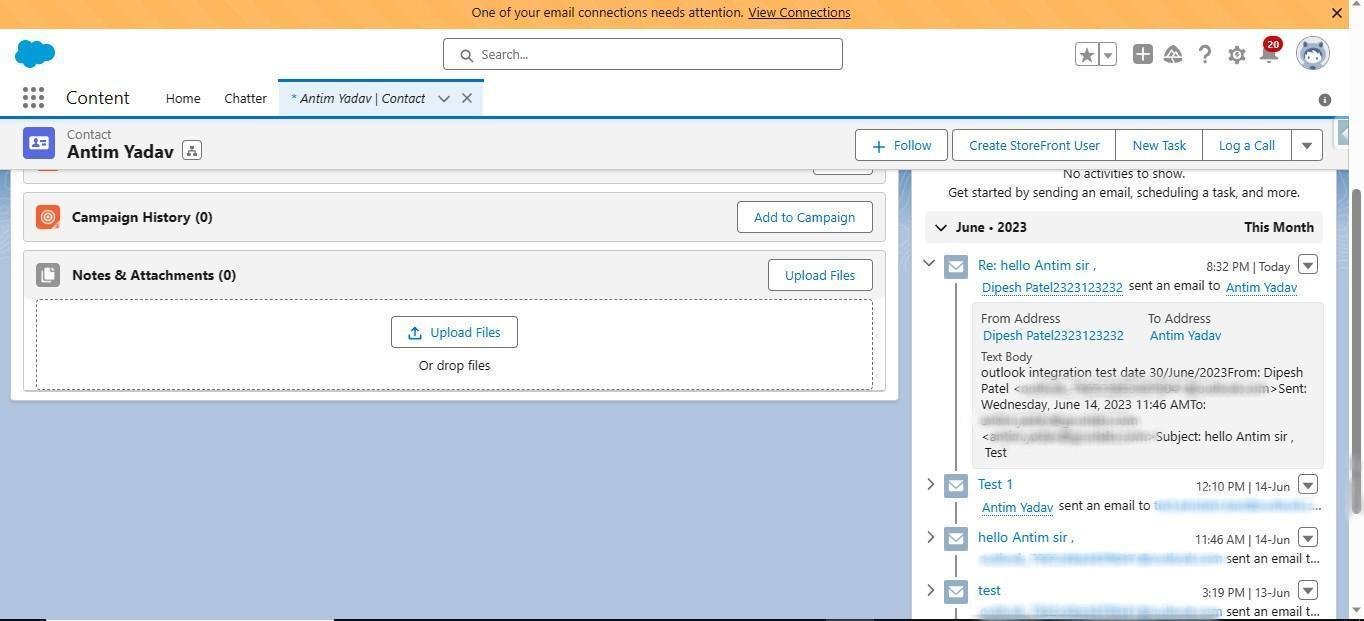
Step 3. Click Save. And your email is logged
2020-, Gruslabs Software Solutions Pvt. Ltd. All rights reserved.